Khapli Wheat
Khapli Wheat Baati Recipe With Crispy Ghee-Brushed Crust
Khapli Wheat
50 mins
Cooking Time
Easy
Difficulty
7
Ingredients
Veg
Diet
Khapli Wheat Baati carries the earthy comfort of traditional Rajasthani cooking while bringing in the goodness of an ancient grain. These baked dough rounds turn crisp outside and stay slightly dense inside, making them ideal with hot dal and melted ghee. The recipe uses Aashirvaad Chakki Khapli Atta, prepared from heritage Khapli wheat known for its naturally rich fibre and protein content.
Aashirvaad Chakki Khapli Atta is made using ancient emmer wheat that has been valued in Indian kitchens for generations. It contains 30% more protein than regular wheat and passes through 40+ quality checks for consistency. The flour also contains lower sugar content and higher dietary fibre, making it suitable for slow, hearty meals that keep you satisfied longer.
This baked version works especially well during cooler evenings or festive family lunches when heavy fried dishes feel too much. The dough stays simple with ajwain, semolina, and ghee, allowing the nutty flavour of the flour to stand out naturally. Once baked, the baatis develop a deep golden shell that cracks beautifully when pressed with warm ghee before serving.
Ingredients
UNITSIngredients
2 cupsAashirvaad Chakki Khapli Atta
1/4 cupSemolina
4 tablespoonsGhee
1 teaspoonAjwain
1 teaspoonSalt
about 3/4 cupWater (as needed)
for brushing Ghee (for serving)
Kesar Mango & Fabelle White Chocolate Mousse Summer Dessert
Kesar Mango & Fabelle White Chocolate Mousse brings together the floral sweetness of Gujarat’s famous Kesar mangoes and the creamy richness of premium chocolate in one chilled dessert. Served in small glasses, this mousse feels light after a heavy meal while still carrying a luxurious texture that works beautifully for summer gatherings and festive dinners. The deep orange shade from ripe mango pulp also makes it visually striking on a dessert table. The use of Fabelle Open Secret Milk Chocolate Bar gives the mousse a smoother finish and helps it set naturally without gelatin. Once melted into the mango mixture, the chocolate creates body while keeping the dessert soft and airy. The saffron adds warmth and complements the fruity aroma instead of overpowering it. This dessert works especially well during mango season when Kesar mangoes are naturally sweeter and less fibrous. Unlike baked desserts, this mousse needs very little cooking, making it practical for home cooks planning for parties, brunches, or family dinners.140 minseasyHomemade Chaat Masala Recipe For Fruits, Chaats And Snacks
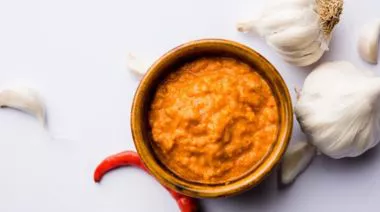
Homemade Chaat Masala brings together smoky cumin, sharp black salt, peppery warmth, and tangy dried mango powder in one fragrant spice blend. Chaat masala became popular in North Indian street food culture because it instantly lifts simple snacks with salty, sour, and spicy layers. Freshly prepared batches taste stronger and more balanced than packaged versions because the spices retain their natural oils and aroma. This seasoning works especially well during summer when fruit chaats, lemon drinks, and yoghurt-based snacks become common in Indian homes. Roasted cumin forms the earthy backbone of the blend, while mint leaves add freshness that lingers after every bite. The balance between black salt and dried mango powder creates the signature street-style flavour found in bhelpuri, fruit bowls, and aloo chaat. A good chaat masala recipe also gives home cooks flexibility. Sprinkle it over cucumber slices, add it to buttermilk, mix it into marinades, or dust it on roasted nuts for extra punch. Since the mixture stays shelf-stable for weeks in an airtight container, many families prepare a fresh jar before festive gatherings or warmer months when chaats and cooling snacks appear more frequently on the table.12 minseasyWorld Health Day Meal Idea: Nutritious Masala Barley Pulao Recipe
World Health Day is a gentle reminder to take a step towards better eating habits, and what better way to begin than with a nourishing homemade meal. This comforting masala barley pulao recipe brings together the goodness of barley and fresh vegetables in a way that feels both satisfying and light. It’s perfect for days when you want something warm, flavourful, and nutritious. With every spoonful, you get a balance of taste and nutrition that truly supports mindful eating. Barley is commonly known as “Jau” in Hindi. This masala barley pulao recipe is a simple and comforting dish that brings together health and taste in the easiest way. Barley gives it a mild, nutty taste, while fresh herbs and everyday spices add a gentle warmth. As the garlic and onions cook, they release a rich aroma that blends beautifully with the freshness of mint and the slight tang of tomato. The texture is soft with a slight chew, making every bite satisfying. Barley is rich in fibre, helping you stay full for longer and supporting healthy digestion. Combined with colourful vegetables and light seasoning, this pulao recipe makes a balanced meal that is both wholesome and easy to enjoy any day of the week.35 minseasy
Plate it up!
Plate it up!
Plating Instructions
Plating Instructions
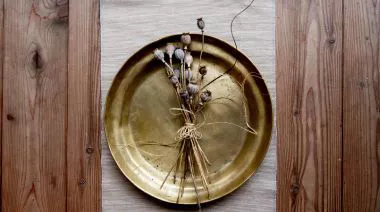
Place two warm baatis in a rustic bowl or brass plate with a small serving of dal poured beside them.
Pairing Instructions
Pairing Instructions
Serve with panchmel dal, garlic chutney, sliced onions, and chilled chaas for a balanced Rajasthani-style meal.
Garnishing Instructions
Garnishing Instructions
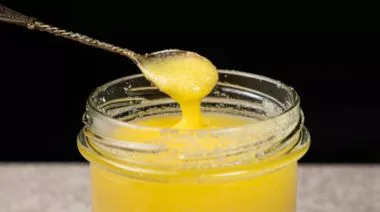
Brush extra melted ghee on top and scatter chopped coriander for a fresh finish.
Khapli wheat gives the baati a nuttier taste and denser texture. It also contains more fibre and protein compared to standard wheat flour recipes.
Share
Save for later
Veg
Neapolitan Pizza Sauce: A Flavourful and Tangy Pizza Sauce
25mins
|Easy
Share
Save for later
Veg
Pav Bhaji Masala: An Easy and Tasty Masala for Pav Bhaji
15mins
|Easy
Share
Save for later
Veg
Sweet Potato Oats Tikki Recipe
50mins
|Easy