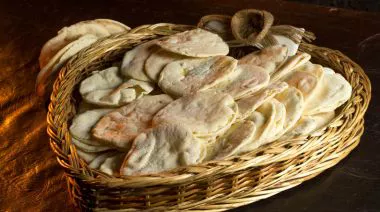
Pita Bread
Khapli Wheat Pita Bread Recipe With Soft Bakery-Style Pockets
Pita Bread
96 mins
Cooking Time
Intermediate
Difficulty
7
Ingredients
Veg
Diet
Khapli Wheat Pita Bread brings together the comfort of homemade flatbreads and the nutty depth of an ancient grain. The bread develops airy pockets while baking, making it suitable for wraps, dips, mezze platters, or hearty sandwich fillings. Using Aashirvaad Chakki Khapli Atta gives the pita a fuller texture and richer flavour than refined-flour versions commonly sold in stores.
Aashirvaad Chakki Khapli Atta is prepared from heritage emmer wheat that has been part of Indian food traditions for centuries. It contains 30% more protein than regular wheat and undergoes more than 40 quality checks before reaching the kitchen. The flour is naturally rich in dietary fibre and has a lower sugar content, which makes the baked bread feel more satisfying without becoming heavy.
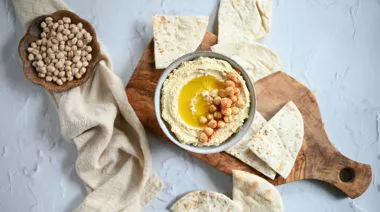
Fresh pita bread tastes best straight from the oven while still warm and flexible. The dough needs proper kneading and enough resting time so steam can build inside during baking. Once puffed, the breads become soft enough for stuffing with grilled vegetables, falafel, paneer fillings, or smoky hummus spreads. Wrapping them in a kitchen towel after baking keeps the texture tender for longer.
Ingredients
UNITSIngredients
2 cupsAashirvaad Chakki Khapli Atta
1 teaspoonInstant yeast
1 teaspoonSugar
1 teaspoonSalt
3/4 cupWarm water
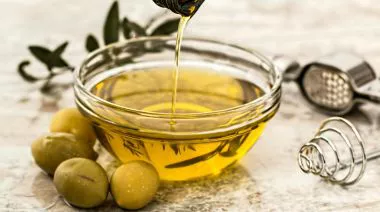
1 tablespoonOlive oil
as neededWheat flour for dusting
Raoh Ki Kheer: Sugarcane Rice Dessert With Nuts & Cardamom
Raoh ki kheer is a lesser-known regional dessert where sugarcane juice replaces milk, giving the dish a deep, earthy sweetness. The flavour feels closer to jaggery-based sweets but with a fresher, grassy note that comes directly from the cane juice. Often prepared during harvest seasons, this traditional sugarcane kheer reflects how local ingredients shape everyday cooking. The addition of lassi helps balance the sweetness while also clarifying the juice during cooking, resulting in a smoother texture. What makes Raoh ki kheer stand apart is its layered texture: soft rice grains, crunchy peanuts, and mild cardamom aroma. It is not overly thick like regular kheer, which makes it lighter and easier to enjoy after a heavy meal.45 minsintermediateHomemade Butter Naan: Make Soft Restaurant-Style Naan At Home
Butter naan is one of the most iconic Indian breads, often associated with restaurant meals, rich curries, and indulgent dining experiences. Traditionally baked in a tandoor, this bread develops its signature soft interior and slightly charred, smoky exterior from the intense heat of clay ovens. However, with the right technique, it’s entirely possible to recreate a similar texture at home using a simple pan. This homemade version focuses on accessibility without compromising on flavour or texture. The combination of yoghurt and milk in the dough plays a crucial role in achieving that soft, pillowy bite. Yoghurt adds a slight tang while also tenderising the dough, and milk enriches it, giving the naan a subtle sweetness and softness that stays even after cooling. One of the defining characteristics of butter naan is its ability to complement a wide variety of dishes. Whether paired with creamy paneer gravies, robust lentil dishes, or spicy curries, naan acts as both a vessel and a flavour enhancer. Its slightly chewy texture allows it to scoop up gravies effortlessly, making every bite more satisfying. Another reason this bread remains a favourite is its versatility. It can be kept plain, brushed generously with butter, or elevated with toppings like garlic and coriander. Each variation brings a different layer of flavour, making it adaptable for both everyday meals and special occasions. Making naan at home also gives you control over ingredients and freshness. Unlike store-bought versions, freshly made naan has a softness and aroma that’s hard to replicate. The process itself is straightforward, and once you understand the basics, it becomes a reliable addition to your cooking repertoire.30 minsintermediateJackfruit Erissery Recipe: Kerala Coconut Curry With Tempering
Jackfruit Erissery carries the warmth of Kerala home kitchens, where seasonal produce is never wasted. Ripe jackfruit gets cooked down until soft, then gently mashed to absorb coconut paste and spices. The texture lands somewhere between chunky and creamy, making every bite feel rich without being heavy. This preparation is often seen during temple feasts and festive meals, especially when jackfruit is in peak supply. The sweetness of the fruit balances the heat from chillies, while cumin and garlic lend depth. What stands out is the final tempering poured over the dish, adding a nutty crunch and aroma. Known as a comforting jackfruit coconut curry, it fits well with simple rice meals. It also reflects the idea of using local, seasonal ingredients in a way that keeps flavours grounded and familiar without overcomplicating the process.45 minsintermediate
The oven temperature may not have been hot enough. A preheated tray and properly rested dough help create steam that forms the pocket inside.
Share
Save for later
Veg
Rosemary Garlic Focaccia Bread
20mins
|Easy
Share
Save for later
Veg
Homemade Matar Kulcha: A Tasty and Delicious Meal
500mins
|Intermediate
Share
Save for later
Vegan
Thalipeeth: A Healthy and Delicious Flatbread
25mins
|Intermediate