Home
Recipes
Seekh Kebab

Seekh Kebab

IndianIndianIntermediateIntermediateAppetizerAppetizer
Seekh kebabs cooking on a barbecue grill. (banner image)
recipe-like
0 Like

recipe-save
Save

Share
recipe-like
0 Like

recipe-save
Save

Share

Authentic
Seekh Kebab
Recipe: Juicy Lamb Kebab On Skewers

35 mins
Cooking Time
Intermediate
Difficulty
21
Ingredients
Non Veg
Diet
Kebabs are a staple of Indian cuisine, coming in different shapes, sizes and tastes. This is one of the beloved kebab recipes for seekh kebab. Here, seasoned minced meat is pressed onto skewers and cooked over high heat until charred on the outside and juicy within. The word 'seekh' refers to the skewer itself, and the kebab is nothing without it, or rather, gets its shape from it. The direct heat is what gives seekh kebabs their signature smoky, toasty exterior. 
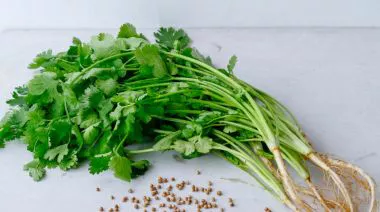
This seekh kebab recipe uses minced lamb with around 20 per cent fat, which is the sweet spot for the kebabs to retain their shape on the skewer, without drying out. The spice mix is generous with chilli powder, chilli flakes, garam masala, cumin, turmeric, basaar spice mix, and fresh coriander. There’s also tomato, onion, and green chillies, the moisture of which is squeezed out before mixing, so the kebabs bind properly. With this mix, you get seekh kebabs that are juicy with generous flavour. The recipe is flexible, as in you can grill them under a broiler, pan-fry in a cast iron skillet, air-fry, or bake – all options are covered below. Whichever method you choose, seekh kebabs reward a little patience: marinate the meat overnight if you can, cook one test kebab first to dial in your timing, and always finish with a brush of melted butter while still hot.

Ingredients

UNITSIngredients
1 kgMinced lamb (For the kebab mix)
1Large tomato
1Large onion
12Green chillies (adjust to taste)
2 tspSalt (Seasonings)
2 tspChilli powder
2 tspChilli flakes
1 tspPaprika
1 tspBasaar spice mix
½ tspBlack pepper
½ tspTurmeric
½ tspGaram masala
½ tspCumin seeds
1 tbspMinced ginger
1 tbspMinced garlic
1 tbspOlive oil
1 tbspLemon juice
a handfulFresh coriander
for brushingMelted salted butter
To serve Garlic naan
To serveGrilled onions and bell peppers on skewers

Related Recipes:

View all
  • viral-hot-honey-tandoor-chicken-sweet-and-smoky-party-favourite-thumbnail

    Viral Hot Honey Tandoor Chicken: Sweet And Smoky Party Favourite

    Make Viral Hot Honey Tandoor Chicken brings together two bold flavour profiles in one dish. The smoky, spiced tandoori base meets a sticky, glossy glaze that leans slightly sweet with a noticeable heat. This combination has gained attention for how it shifts a familiar preparation into something sharper and more layered. The hot honey chicken recipe works because of contrast. The marinade builds depth using curd, spices, and mustard oil, while the glaze cuts through with sweetness and a mild tang. Each bite carries charred edges, soft meat, and a light coating that clings without overpowering. This dish fits well for gatherings or weekend cooking when there’s time to marinate properly. It also adapts easily to oven or grill setups, making it practical even without a traditional tandoor. The result feels rich, slightly smoky, and balanced without needing heavy sides.
    45 mins
    intermediate
  • quick-dinner-idea-oven-baked-chicken-biryani-in-30-minutes-thumbnail

    Quick Dinner Idea: Oven-Baked Chicken Biryani In 30 Minutes

    Chicken biryani has long been celebrated as one of the most aromatic rice dishes in South Asian cuisine. Traditionally slow-cooked with layers of rice, marinated meat, and fragrant spices, it creates a dish where every grain absorbs flavour. This quicker baked version keeps those classic elements while simplifying the cooking process for busy kitchens. This oven-baked chicken biryani is ideal when you want a hearty meal without spending hours in the kitchen. The partially cooked rice and marinated chicken finish cooking together in the oven, producing fluffy grains and tender meat. It works especially well for family lunches, weekend dinners, or small gatherings where a warm, comforting dish becomes the centre of the table.
    45 mins
    intermediate
  • nargisi-kofta-recipe-a-rich-mughlai-egg-and-meat-curry-thumbnail

    Nargisi Kofta Recipe: A Rich Mughlai Egg And Meat Curry

    Nargisi kofta is a Mughlai dish that takes its name from the narcissus flower (called ‘nargis’ in Urdu and Hindi) because when you slice the kofta in half, the yellow yolk surrounded by white egg resembles the flower's yellow centre and white petals. When it comes to the Nargisi kofta recipe, it has contested origins with both Lucknow (home of Awadhi cuisine) and Hyderabad claiming to have created it. Although the concept of kofta is said to have come from Persia to India through the Mughals. What makes Nargisi kofta distinct from regular kofta curries is that, instead of serving boiled eggs alongside the meatballs as is common in many kofta dishes, here the hard-boiled eggs are completely encased inside a spiced minced meat mixture before they are deep-fried and then simmered in gravy. Its recipe requires some technique but isn't as complicated as it appears. The Nargisi kofta recipe usually uses mutton or lamb mince, though chicken works well, if you want a less rich version. The meat is mixed with finely chopped or ground onions, ginger-garlic paste, green chillies, and spices, then bound with gram flour (besan) and a raw egg. The mixture needs to be smooth enough to spread evenly around the boiled eggs but firm enough to hold its shape during deep frying. The gravy is a classic onion-tomato base enriched with yoghurt and finished with kasuri methi.
    100 mins
    intermediate

Follow
Directions

Description - Step 1

Step 1: Prep the vegetables

Finely chop the tomato, onion, and green chillies. Once chopped, use your hands or a muslin cloth to firmly squeeze out as much liquid as possible from the mixture. Excess moisture will prevent the kebabs from binding properly on the skewer.


Description - Step 2

Step 2: Mix and marinate

Add the squeezed vegetable mixture to the minced lamb along with all the seasonings: salt, chilli powder, chilli flakes, paprika, basaar, black pepper, turmeric, garam masala, cumin seeds, ginger, garlic, olive oil, lemon juice, and fresh coriander. Mix thoroughly until everything is combined. Cover the bowl and refrigerate for at least 1 hour. Overnight marination gives the best flavour.


Description - Step 3

Step 3: Prepare the skewers

If using metal kebab skewers, oil your hands before handling. If you don't have metal skewers, wrap a few wooden skewers or chopsticks tightly in tinfoil – these work just as well. When ready to cook, turn your grill or broiler to medium heat and allow it to preheat for about 10 minutes.


Description - Step 4

Step 4: Shape the kebabs

With lightly oiled hands, take a portion of the meat mixture and press it firmly around a skewer, forming a long, even cylinder roughly 18 cm in length. Avoid making them too thick, as this will extend cooking time significantly and risk an undercooked centre. Repeat with the remaining mixture.


Description - Step 5

Step 5: Grill and finish

Place the skewered kebabs on a wire rack set over a tray and slide them under the grill on medium heat. Cook until browned on one side, then flip and cook the other side until fully done; around 6-8 minutes, though this will vary depending on thickness and your grill. Cook one test kebab first to gauge your timing. Once cooked, brush generously with melted butter while still hot. Remove from skewers and serve immediately.

Other cooking methods:

  • Pan-fry: Remove kebabs from skewers (freeze for 10-15 minutes first if they're sticking). Cook in a cast-iron or regular pan with neutral oil over medium heat, turning frequently.

  • Air-fry: Remove from skewers, brush with oil or butter, and cook at 200°C, flipping halfway.

  • Bake: Preheat oven to 220°C. Place on a tray, brush with butter or oil, and bake until done, flipping once.

Step 1
Step 1: Prep the vegetables
10 Minutes
Step 2
Step 2: Mix and marinate
10 minutes + at least 1 hour resting
Step 3
Step 3: Prepare the skewers
5 Minutes
Step 4
Step 4: Shape the kebabs
10 Minutes
Step 5
Step 5: Grill and finish
6-10 Minutes

Plate it up!

Plating Instructions

plating-instructions-image

Serve seekh kebabs on a wide plate or a wooden serving board in a dark colour to contrast with the kebabs.

... Read More

Pairing Instructions

pairing-instructions-image

Seekh kebabs pair best with garlic naan, a mint-coriander chutney, and a simple sliced onion salad dressed with lemon juice.


... Read More

Garnishing Instructions

garnishing-instructions-image

Scatter freshly chopped coriander over the plated kebabs. Add a wedge of lemon on the side and a few raw sliced onion rings.

... Read More

You may also
like

share-image
Share
save-later-image
Save for later
kid-friendly-chickpea-mini-pizza-for-high-protein-lunchboxes-thumbnail
Non Veg
heart image
Kid-Friendly Chickpea Mini Pizza For High-Protein Lunchboxes
31mins
|
Easy
share-image
Share
save-later-image
Save for later
thai-style-rice-vermicelli-stir-fry-simple-delicious-dinner-thumbnail
Veg
heart image
Thai Style Rice Vermicelli Stir Fry – Simple & Delicious Dinner
22mins
|
Easy
share-image
Share
save-later-image
Save for later
quick-dinner-idea-oven-baked-chicken-biryani-in-30-minutes-thumbnail
Non Veg
heart image
Quick Dinner Idea: Oven-Baked Chicken Biryani In 30 Minutes
45mins
|
Intermediate
foodies-logo
Let's make this more delicious! Get curated content in your inbox
By clicking "Subscribe", you agree to ourPrivacy Policy and to receive marketing emails from Foodies Only
About UsContact UsSite Map
FAQsPrivacy PolicyTerms of Use

Copyright © 2025 Foodies Only

Instagram-logoFacebook-logoYoutube-logo